The change to nested menus
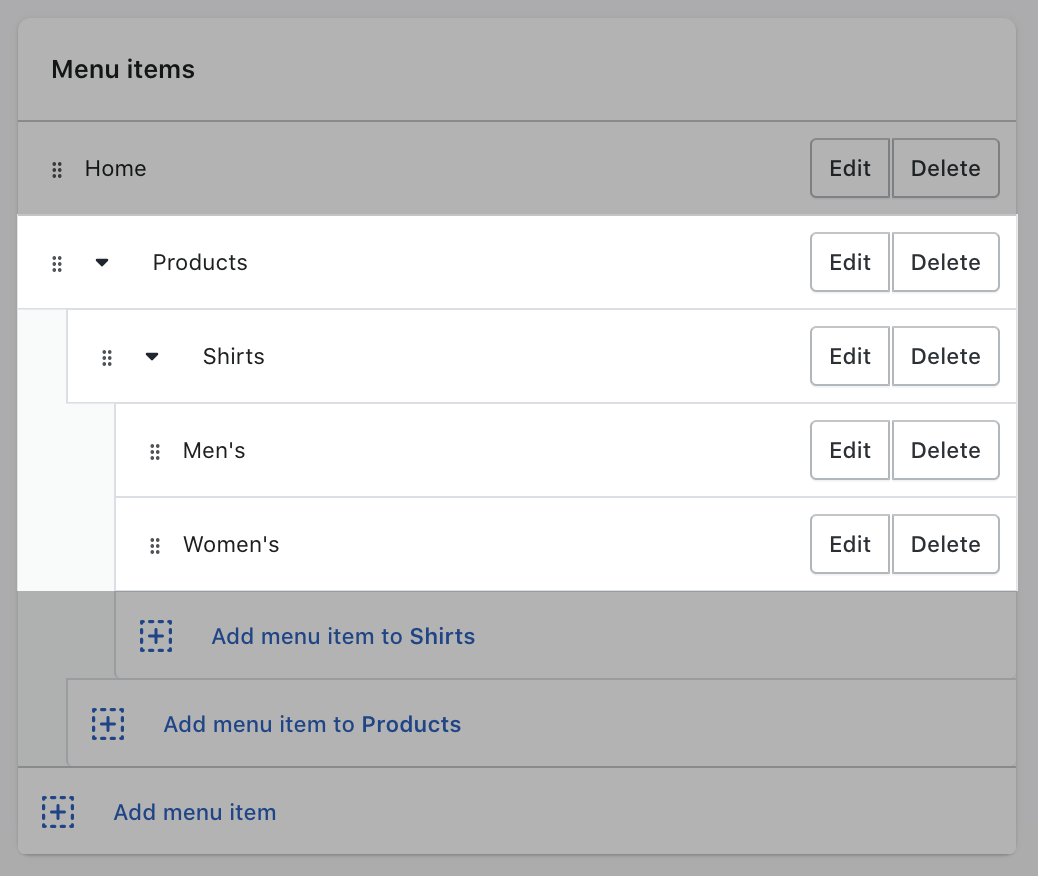
Nested navigation makes it easier to create and arrange drop-down menus because you can see the different levels of your menus in your Shopify admin. You can view updates to the menu interface on the Navigation page in your Shopify admin.
To ease the transition, the previous way of creating drop-down menus will continue to be supported. But, you will need to recreate your drop-down menus as nested menu items to enjoy the new functionalities. If you switch to a theme that supports the link.links liquid attribute, then you will then need to recreate all your drop-down menus.